 (a
number between two
arrow buttons).
(a
number between two
arrow buttons).Skip to Content - to Index
- go
back Home
Skip to the update
log
Welcome to the Editor Tutorial of Rocks'n'Diamonds. This document is part of the Rocks'n'Diamonds Documentation ( F.A.Q. - User's Manual - Elements Reference - Editor Tutorial )
This document has been written and is currently maintained by Francesco S. Carta. Your comments, suggestions and questions are welcome.
Rocks'n'Diamonds has been created by Holger Schemel, from Artsoft Entertainment. The program
is currently being developed and supported by its author.
Since the Level Editor is fundamentally a simple painting program -
as for what the map design will be about - then there will be no
explicit "Basic Level Design" section. Just read the descriptions of
the various parts of the Level Editor given in the following sections,
and you'll have all the information you need to design a level.
If you already know how to use the editor, but you need some
explanation about configuring standard elements like YamYams, Amoebas,
BonusTime pickups, Magic walls and so on, you can jump directly to the Standard Element Editing section.
The biggest frame of the Level Editor is the Map Editing Area. You can scroll the map using the scrollbars, and you can also scroll it using the mouse wheel. The mouse wheel alone will scroll vertically, and in combination with the 'SHIFT' key will scroll horizontally. Additionally, the 'ALT' key can be used to force single-step scrolling.
At the bottom of the Map Editing Area there is the Status Line: it shows a lot of useful information about the object onto which the mouse pointer is hovering on - it can be a button, a tile of the map, an option in the Property Pages and so on.
The Status Line has two operating modes: Normal mode is when you simply hover the mouse pointer over something, without pressing any key on the keyboard, Control mode is when you hold down the 'CTRL' key.
| Position of the mouse pointer | Status Line in Normal Mode | Status Line in Control Mode |
|---|---|---|
| A tile on the map. | The level position of that tile. | The name of the element that occupies the tile. |
| A tile in a Property Page. | What the element will be used for. | |
| Any clickable object (buttons, checkboxes, drop-down lists, text fields and number fields). | The description of that object. | |
| The green texts in the Property Pages. | Nothing. | |
In the Level Editor, the top-right frame holds the Elements List Area.

On the top side there is the Level Selector (a
number between two
arrow buttons).
It shows the number of the level you are currently
viewing/editing.
All the buttons that affect some numeric field will
respond to the mouse clicks depending on the mouse button that you use.
With the primary mouse
button, the value gets increased or decreased by one unit.
Using the middle mouse button, the value changes by five units. The secondary mouse button changes the value by ten units.
Changing the current level could lead to this message "Level has changed. Discard changes? YES/NO". If you want to keep the changes, you'll have to select NO and save your work.
In the middle stands the Elements List. Click any element to set it
as one of the current Drawing Elements.
You can use the mouse wheel to scroll this list. Use the 'ALT' key along with the mouse wheel to force 1-step scrolling.
 Right below the Elements List
there are three
separate boxes that show the three Drawing Elements, one for each mouse
button.
Right below the Elements List
there are three
separate boxes that show the three Drawing Elements, one for each mouse
button.
The Drawing Elements are sometimes referred to as the "current
elements" or the "active elements", but this is not correct. There is
just one current/active element, and that's the element shown in the
Property Page (also called "Element Settings" screen or page). Read on
to the next section for further information about the "Element
Settings" screen.
Clicking any element in the Element List will set the Drawing
Elements, depending on the mouse button that you use.
The left box is tied to the primary mouse button, the middle box is tied to the middle mouse button and the right box is tied to the secondary mouse button.
The lines above mean that these boxes will not be switched of position if you have set your mouse for a left handed user. In such a case, the left box will be tied to the right mouse button, and the right box will be tied to the left mouse button. To avoid any preference and any confusion, here we'll use "primary, middle and secondary", instead of "left, middle, right".
The bottom-right frame of the Level Editor holds the Editing Tools Area.
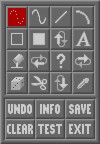
This area shows several different buttons, either graphical or textual. Some of them are drawing tools.
The tool marked in red is the
active one.
is the
active one.
Some
buttons are direct commands, just like SAVE, TEST or "Wrap map to the
left", and do not hold the "red, active" state.
The shortcuts for each button are shown between parenthesis in the following list, along with a short description of the relative tool or command. Some buttons have no shortcut, so you'll have to click them.
Notice that even if the Status Line reads out uppercase characters for each shortcut, all of them will be lowercase. Reading 'R' on the Status Line means to press the lowercase 'r' key, reading 'SHIFT+R' means 'SHIFT+r' and so on.
Be careful not to turn capslock on, otherwise all the shortcuts will be switched, and you'll have to hold the 'SHIFT' key to make them work.

Using this tool you can put single elements on the map: just click on the map.
You can also draw lines by clicking and holding the button - and moving the mouse, of course. If you move the mouse too quickly, the line could result to be broken in some point.

This tool allows making lines which will be continuous at each point, no matter how fast you move the mouse pointer.

Use this tool to draw straight lines.
Click on the map and
hold the button to set the start point of the line, then drag the
pointer to set the end point. Release the mouse button to
draw the line.

The arcs created by this tool will be always circular sections (no ellipses, sorry) and they will be always 90° wide.
Click and hold on the map to set the center point, then drag the pointer to set the radius. Release the mouse button to draw the arc.

Use this tool to draw outline rectangles. Click on the map and hold
the button to set one angle of the rectangle, then drag the pointer to
set the sizes of the rectangle. Release the mouse button to draw the
rectangle.

Use this tool to draw filled rectangles. Click on the map and hold the button to set one angle of the rectangle, then drag the pointer to set the sizes of the rectangle. Release the mouse button to draw the rectangle.

Using this tool you can add text elements to the map using the
keyboard.
Select this tool and click on the map: a white border will appear on
the tile that you have selected, to represent the text cursor.
Now type the text you need (all shortcuts will be deactivated in Text
mode). To enter a new line, use the 'ENTER' key.
Use the 'ESC' key to exit from Text mode, or select another tool.
Using the 'BACKSPACE' key you can undo single keystrokes, but you can't undo a previous line closed with the 'ENTER' key. To undo such a line you need to use the UNDO button.

With this tool you can fill irregular areas of tiles. These tiles must have the same element (or must be empty), and they have to be adjacent, that is, they have to touch one another side by side. The Flood Fill tool won't affect tiles touching corner by corner.

Use this command to switch between the Map View and the Property Pages View.
Depending on the mouse button that you use to click it, you'll see the settings of one of the three Drawing Elements. The element that appears on the ELEMENT SETTINGS pages (Property Pages) is called "active element" or "current element".
 - no keyboard shortcut
Use these command buttons to move all the elements of the map to one direction or to another.
According to each direction, the last row/column will be moved to the opposite side, becoming the first.
 - no keyboard
shortcut
- no keyboard
shortcutThis command button places some elements in randomly chosen tiles of the map. These tiles could be empty or not, so the randomly placed elements could replace the elements already present on the map.
The elements that will be placed will depend on the Drawing Element tied to the mouse button that you use to click this command button.
The INFO button opens a page which shows, at the bottom, the Editor Settings. These settings are about the random element placement. You can set the amount of elements placed per click (absolute number or percentage of all map tiles), there is also an option that restricts the random placement to those tiles that have a specific element. If there are no tiles with that element, no elements will be placed.

Use this tool to select a rectangle of elements from the level map.
Right after that you release the mouse button, the mouse pointer will
move around a "brush of elements" as big as the selection you have
made.
Drawing the "brush-selection" rectangle with the primary mouse
button will copy the elements from the map to the brush. On the
contrary, drawing the "brush-selection" rectangle with the middle or
with the secondary button will fill the selected area with the
corresponding middle or secondary Drawing Element. In other words, with
the primary button you grab the brush by copying the elements, with the
middle and the secondary buttons you grab the brush by cutting the
elements from the map and filling the area with a single type of
elements.
Once you have grabbed the brush, you can use it in different
ways: using it with the primary mouse button will actually paste the
elements that you have previously grabbed. If you use the secondary or
the middle button,
the brush will fill its area using just the secondary or the middle
Drawing Element, depending on the button.
You can use a brush onto a different level - just pick the brush, change the level from the Level Selector and then use the brush.
Important note: this brush carries only the elements' references, it stores no settings for them. It means that if you copy an element from a level to another using this brush, the settings for that element will not be copied to the destination level. To know how to copy settings between elements/levels, see the Additional Buttons section ahead.

Use this tool to pick an element from a tile on the map and set it as Drawing Element - depending on the mouse button that you use. This tool will work also on the Reference Tiles of the Property Pages
Important note: the 'CTRL' key activates this tool only while it is hold pressed: when you'll release it, the previous tool will be selected again. The 'CTRL' shortcut is quite the most used one, because the 'CTRL' key is used also to activate Control Mode for the Status Line.
Use this button to undo up to ten map design actions. If no undo
actions are possible, RnD will show a "UNDO BUFFER EMPTY!" message.
Saving the level will not empty the buffer. Exiting from the Level
Editor or changing the active level will actually empty the buffer.
Important: this button will not undo any other action than a map design action. For example, you can't undo the copy of the settings from a CE to another. The only way to restore such an action is reloading a previously saved version of the level. You would be better saving quite often, but just when you are sure of the changes you have just made.
Use this button to switch between the Map Editing view and the Level
Properties view. The Level Properties page shows options like the level
name and the time limit, among various other things. The Level
Properties page contains also the Editor settings, which are about the Random Element
Placement tool and the initial Wind direction (if
present).
Notice that the players'
gravity can not be set from this page. The gravity must be set from
the Property Page of each Player.
Use this button to save the current level. You will be asked for confirmation about overwriting the eventual old level.
Saving is quite important because it is not possible to undo the CE Programming actions. To restore a saved version of a level that you are currently editing, you simply have to close the Level Editor discarding all the changes, and then open it again. You can get the same result by changing the level number from the Level Selector.
This button clears all the map, setting all the tiles to "empty space".
Use this button to test the level. You can record tapes while testing, but no highscore will be saved though. When you test a level from within the editor, the "no time limit" cheat will be deactivated: it is a reminder for setting a fitting time limits to our own creations.
Use this button to exit the Level Editor. You can use also the 'ESC' key from the Map Editing view. You could be asked for confirmation about discarding the current changes.
A conspicuous number of Standard Elements can be customized with different options.
Let's try one. To change the content of a YamYam, select the YamYam from the Elements List (it can be found in the EM group as well as in the EMC group.
Now that you have selected it (one of the three Drawing Element Boxes should show a YamYam), you have to click on the "?" button on the Editing Tools Area.
You should see something like this, now:
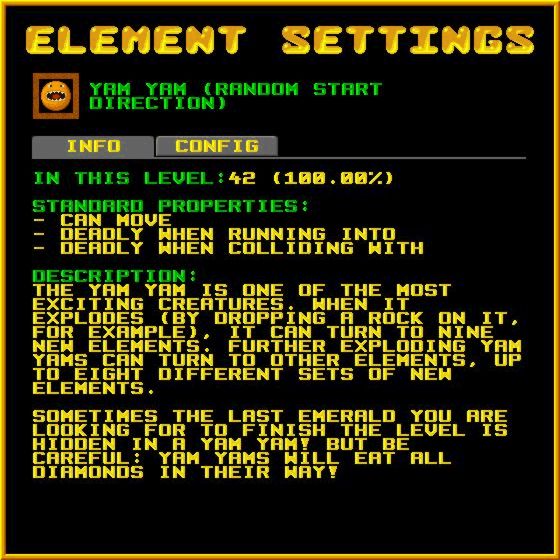
Here is the text-transcription of the screen depicted above:
Well, what you see above is the
INFO tab. There is an appropriate one
for each element, that gives to you some useful informations about that
element.
If you click on the CONFIG tab, you will see something like this:
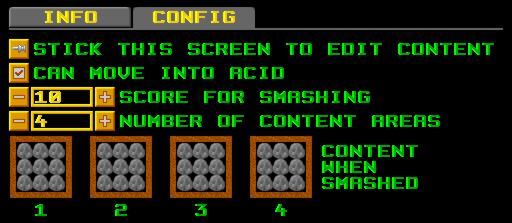
It is all pretty self-descriptive. You can decide if a YamYam
can
suicide itself (falling into acid), you can set how many points you get
when one of
them gets smashed, and finally, you can decide how many sets of
different content they will
disclose.
Then we have the actual Content Areas.
They work just like the Content Lists and
the Content/Reference Tiles.

You can find these Content Areas in YamYams as well as in the
Property Pages of Magic Balls
and CEs.
You can draw on these content areas just like you draw on the normal
map.
When you select an element, the
Property Page turns to the properties of that element. If you want to
pick a different element to be put in a content area, you need to lock
the current page as first step. You can do that in two different ways:
A different approach:
For example, since we are already speaking of YamYams, if you
want to put emeralds and rocks inside of a YamYam, you would:
- select the "emerald" element with the secondary button - the Property
Page will switch to the "emerald";
- select the "rock" element with the middle button - the Property Page
will switch to the "rock";
- select the "yamyam" element with the primary button - the Property
Page will switch to the "yamyam": now you can draw on the content areas
with the secondary and the middle mouse buttons -
eventually also with the primary button, as you can freely put a yamyam
inside of another yamyam.
There isn't so much to add about standard element editing, but we
can dig a bit further the Content Areas.
For each Content Area, the central field corresponds to the position of the YamYam when it gets smashed. Let's make an example: imagine we have a YamYam with a Content Area like this:


If we smash it while it is beside some indestructible element (like the steel walls), we will lose part of its content:


![]()
![]()
![]()
![]()
![]()
![]()

![]()

![]()
![]()
![]()
![]()
![]()
![]()
On the contrary, we can smash it when surrounded by normal walls,
getting all the content:
![]()
![]()
![]()
![]()

![]()
![]()
![]()
![]()
![]()
![]()
![]()
![]()
![]()
You can find these Content Lists in the Property Page of Group Elements and Androids:
![]()
The size of the list can be changed using the option "NUMBER OF
ELEMENTS IN GROUP" for the Group Elements and using the option "NUMBER
OF CLONABLE ELEMENTS" for the Android.
A Content List set to 1 will look like a single Content
Tile/Reference Tile.
This is the real size of a Content List in RnD:
CONTENT:![]()
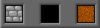
This is the appearance of an empty content/reference tile:
![]()
This is the appearance of a YamYam inside of a content/reference
tile:
"Content tile" and "Reference tile" are just two names for the same
thing, that is, a single drawing tile.
These names are used depending on the position of the tile. If the
tile is beside an option like "CONTENT:" or something similar, then the
tile is called "Content tile". If the tile is beside an option like
"USE GRAPHICS OF ELEMENT:" or "[PLAYER TOUCHES] ELEMENT:" or simply
"ELEMENTS:" (for the Android), then the tile is called "Reference tile".
These tiles are used in the Property Pages
of Amoebas, CEs and GEs.
Each Property Page uses a "sandbox" tile like those shown above, but
it is just the "current graphics of element" - it is usually animated
and it is bigger than content and reference tiles.
This is the real size of a content/reference tile in RnD:
[V]
USE GRAPHIC OF ELEMENT:
These buttons are shown in the
Editing Tools Area (while the
Property Pages view is active) only when either a CE or a GE is
selected.
All
of these buttons are about copying settings from an element to another.
One of
them, in particular, exchanges an element with another.
The following buttons can be
used only within the same level:
 Copy settings
from other element (to the active element)
Copy settings
from other element (to the active element) Copy settings
to other element (from the active element)
Copy settings
to other element (from the active element) Exchange
element with other element
Exchange
element with other elementAll
of the above buttons are used in the same way: first of all select
(activate) the first element (so that the Property Pages show its
settings). Then one of the above buttons, and finally select the second
element. The copy or the exchange are made as soon as you click the
second element. Be careful with these first two buttons, because you
can't undo their effects. The last button is the less dangerous,
because you can undo it by simply switching them back.
These other buttons can be
used to copy the element's settings also
from a level to another:
 Copy settings from this (active)
element
Copy settings from this (active)
element Paste settings to this (active)
element
Paste settings to this (active)
elementAgain, be careful, because you can't undo any element copy/paste.
The Exchange button deserves some deeper explanation.
Historical
note: up to some versions of RnD ago, it was a very dangerous tool,
because it exchanged the settings between the two elements without
affecting all the other elements that made reference upon them,
breaking all the logical relations between all these elements.
Nowadays,
the Exchange Elements tool is the best one to organize in a coherent
way your Custom Elements: it actually goes on exchanging the settings
of these two elements, but also it dynamically
updates all those elements
that made reference upon them,
keeping the all the logical relations unaltered.
The next section will introduce the inner properties of a generic RnD element, to dig deep into CEs pretty quickly... ready to go?
The RnD engine uses a unique
token for each kind of element it can
recognize.
The tokens are used in the Configuration
Files. The token of each element will be displayed in the Property
Pages, if this
option
of the
SETUP SCREEN is active.
Normal elements' tokens
reflect their "being": the token for the
emerald is "emerald" and the token for the sand is "sand". Since not
all normal elements can be called with a simple one-word token, some of
them are slightly more complex: the token for the Boulder Dash style
rock is "bd_rock"; the token for the spaceship that starts moving upwards is
"spaceship.up"; the token for the BD style butterfly that starts moving
down is
"bd_butterfly.down". The difference between the "_" (underscore) and
the "." (dot) separators, as well as a detailed description of the
tokens' usage, will be explained in the "Customizing RnD" section,
which is still to be written.
Custom Elements use a default
graphic, that is a wall of bricks with
a red question mark  .
.
Custom Elements
can be found in the Elements List, in the CE section. If you can't find
any CE section there, then maybe it is turned off in the EDITOR SETUP screen.
Custom Elements have tokens
that reflect their progressive numbers,
so their tokens will be "custom_1", "custom_2", "custom_3" and so on
until "custom_256".
Let's introduce the Property
Page now,
and a couple of CE's features/options right
after.
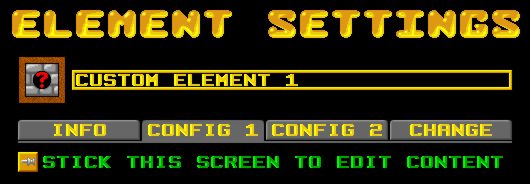
"ELEMENT SETTINGS" and
"Property Page" mean exactly the same thing,
that is, the screen depicted above. It can be accessed clicking on the
"?" button of the Tool Area.
The big tile surrounded by a
sand border, beside the text "CUSTOM
ELEMENT 1", shows the current graphics of the active element.
The text "CUSTOM ELEMENT n" is
the default name of each CE. You can
customize it as you will, but you can edit it only when the text
appears in yellow, inside of a yellow frame, just like the example
above. This name is editable only when the CONFIG 1 tab is active. When
some other tab is active, the name of the CE will be written in green,
and will not be editable.
The Property Page shows the
settings of the active element, and will
change as soon as you select another element.
This could be a problem.
Imagine that you want to put an Emerald
inside of a YamYam. You select the YamYam to edit its content, then you
select the Emerald, but now you see the Property Page of the Emerald,
so you select the YamYam again, but you have no Emerald to put inside
of the YamYam, because now the YamYam is the active drawing element...
seems impossible...
It is impossible to do, using
only one mouse button.
Read the paragraphs about "The Three Ways"
to learn how to manage property pages and elements selection.
Now that we have introduced
the first property of a CE (its name),
let's explain the second one a bit,
its graphics.
The option to do such a thing
can be found in the CONFIG1 tab of the
Property Page, and looks like the following:
![[_] USE GRAPHIC OF ELEMENT: [_]](./res/disabled_empty_option.jpg)
The picture above could be
textually translated in this way:
That option, as shown above,
is deactivated, because its check-box
(that yellow/white square button at the beginning of the line) has no
"v" tick on it.
The black square with a sand
border is a Reference Tile, and it
currently appears to be empty. Well, it is not exactly empty. It
contains an element called "empty space". This element has its own
token and its own unique number, so you can actually use it to refer to
the "empty space" element.
To activate this option you
have to tick (click) its check box.
Let's suppose that we set it
in this way:
![[v] USE GRAPHIC OF ELEMENT: [Number 1]](./res/enabled_set_option.jpg)
Again, the textual version
would be:
Since we can simply "say out"
that it uses the graphics of the
Number 1 element, we'll throw away all graphical/textual
representations of the interface, and we will use just the concept.
So imagine such a situation -
the last line of the table
below shows an
option that is quite complex to set. Don't worry about that, it will be
explained in the next section: just follow the reasoning for now.
| Element Properties Tokens --> | custom_1 | custom_2 | custom_3 |
|---|---|---|---|
| Name: | My Element 1 | My Element 2 | My Element 3 |
| Use graphics of element: | Number 1 | Number 2 | Number 3 |
| After 1 second, change into element: | My Element 2 | My Element 3 | My Element 1 |
If you make the three CEs above and then you put CE1 (that is, the CE with token "custom_1") in the map, testing the level you will see a big green "1" element, which will be replaced by a "2" element, which will change into a "3" element on its turn, which will finally change back to a "1" element. This is process will go on and on, it is a CE loop.
Now suppose that you want to exchange the position of CE1 and CE3. You would use the Exchange Elements button, and you would get this result:
| Element Properties Tokens --> | custom_1 | custom_2 | custom_3 |
|---|---|---|---|
| Name: | My Element 3 | My Element 2 | My Element 1 |
| Use graphics of element: | Number 3 | Number 2 | Number 1 |
| After 1 second, change into element: | My Element 1 | My Element 3 | My Element 2 |
Testing the level, you will see the numbers counting "1, 2, 3, 1, 2, 3, ...", just like they did before.
You will not see them counting backwards "3, 2, 1, 3, 2, 1, ...". If you want them to behave so, you would set them in this way:
| Element Properties Tokens --> | custom_1 | custom_2 | custom_3 |
|---|---|---|---|
| Name: | My Element 3 | My Element 2 | My Element 1 |
| Use graphics of element: | Number 3 | Number 2 | Number 1 |
| After 1 second, change into element: | My Element 2 | My Element 1 | My Element 3 |
All the examples above
demonstrate that the Exchange Elements tool
preserves the relations between the CEs.
Nonetheless, the Exchange
Elements tool could lead to some problems
when you are using custom graphics/sounds for your CEs. If you aren't
interested in such a customization, feel free to skip to the next
section.
Custom graphics are image
files in PCX format, and they have to be
tied to the CEs using an appropriate "graphicsinfo.conf"
file. Click the link to have more details.
Once you have set a CE to use
a particular PCX file, it will be tied
to that file, and the Exchange Elements tool will not be able to update
the "graphicsinfo.conf" file for you.
A small example follows.
Before Exchange Elements:
| Element Properties Tokens --> | custom_1 | custom_2 |
|---|---|---|
| Name: | My Rock |
My Emerald |
| Use graphics of element: | [disabled] |
[disabled] |
| Use graphics taken from file: | "my_rock.pcx" | "my_emerald.pcx" |
After Exchange Elements:
| Element Properties Tokens --> | custom_1 | custom_2 |
|---|---|---|
| Name: | My Emerald |
My Rock |
| Use graphics of element: | [disabled] |
[disabled] |
| Use graphics taken from file: | "my_rock.pcx" | "my_emerald.pcx" |
The links between the elements and their graphics have not been switched, so now you have an element named "My Emerald" that looks like a rock, and an element named "My Rock" that looks like an emerald. To solve this, you have to edit the "graphicsinfo.conf" file manually.
Remember this issue when
you'll customize your CEs, because it will
apply to the custom graphics as well to the custom sound effects.
Among all the options that you
can set for a CE, some of them are
quite simple, like the property of being indestructible. To set such a
property, you simply have to tick the relative option in the CONFIG 1
tab.
Some other options are quite
complex, and need to edit several
sub-options in order to work properly.
Let's consider the last option
introduced in the previous section,
the ability to change into some other element. Such an option has to be
set in a Change Page. All the Change Pages of a CE are inside of the
CHANGE tab.
This is the textual representation of a default, blank change page:
First of all, notice the last
line:
The number says that the
current change page is page number 1. That
line will show also three buttons: the first,, is used to copy in memory the
current change page; the second, , is used to
paste to the current page the page that you have previously saved; the
third one, NEW, is used to create a new change page. Right after that
you add a new change page, a fourth button appears: DELETE. Use this
button to delete the current change page. As soon as there is just one
change page, the DELETE button will disappear. When you run out of
changepages,
the button NEW will not disappear: it simply won't add any new page.
The maximum number of changepages per element is 32.
Copying the change pages
involve a lot of considerations that can't
be made right now, because there are a lot of special elements to
introduce first. These considerations will be made in the "Copying
Issues" section, which is still to be written.
Coming back to the structure
of each single change page, notice how
the options are differently indented: "DELAY:" is a child-option of
"ELEMENT CHANGES TO:", which is its parent-option. In the same way,
"REPLACE WHEN" is a child-option of "USE EXTENDED CHANGE TARGET:".
Setting/enabling a
child-option has effect only when its
parent-option is enabled.
Some of the options above have
more than a parent: it is the case of
the "PLAYER:" option, which is a child of both "[TOUCHED BY PLAYER]"
and "[PLAYER TOUCHES]", and then applies to both of them.
Notice how the two options
mentioned above are written between
square brackets. Inside of RnD, you'll see that those two texts are
written in yellow, inside of a yellow frame: it all means that these
two options are input fields, that is, you can modify them. In
particular, they are two drop-down lists.
If you click on "[TOUCHED BY
PLAYER], you'll see the list of all the
so called Direct Actions.
Direct Actions are all those
events that occur directly to the CE
that is currently being set.
If you click on "[PLAYER
TOUCHES]", you'll see the list of all the
so called Indirect Actions.
Indirect Actions are all those
events that occur to a specified
element, which usually is different from the element that is currently
being set.
Some other options apply only
if its parent has been set in a
specific way: it is the case of the "PAGE:" option, that applies only
if "CHANGE BY PAGE OF:" has been set and enabled as Indirect Action.
Let's make a practical example
about all this stuff: suppose that
you want to make a CE that disappears when touched by the player.
To put in practice the
description above, you just have to enable
two options:
Notice that you need not
to change the Reference Tile besides
of "ELEMENT CHANGES TO:", because "to disappear", or "to change into
nothing", means "to change into empty space", and "empty space" is the
default content of all Reference Tiles.
The example above is quite
simple. A couple of slightly more complex
examples follows.
A CE that disappears either
after 10 seconds from its creation or
when touched by the player, should be set in this way:
A CE that can explode, but
only when touched at the bottom side by
player nr. 2, should be set in this way:
The number of possible
combinations is quite large, and this manual
won't go on further with such examples. We'll go on describing the
properties of the CEs without explicitly saying which option you should
click or which number you should change: simply read out the tab pages
looking for the options you need.
Sometimes you'll have to open a drop-down list to find the option you need. Let's make a last example, a quite complex one:
A CE that looks like the
Number 1, that can be pushed away by the
player, that is indestructible, but that will explode when smashed from
above, would be set as shown here below.
Inside the CONFIG 1 tab:
Inside the CHANGE tab:
If you create a CE using the
above settings, you'll see that it will
work just as stated in the description: you will be able to push it
(from its tile to an empty one), it will be indestructible (you can't
bomb it away with dynamite) and it will explode when smashed from above
(by a falling rock, for example).
If you did actually try that
within RnD, you have noticed for sure
that the CE makes a 3x3 explosion. This is the default setting for any
CE: when exploding, it will extend the explosion to all the surrounding
tiles, eventually destroying any destructible element that could occupy
those tiles.
If you want change this
option, you'll find it inside of the CONFIG
2 tab:
You don't need to tick that
option, simply change the setting and it
will be used by the option in the CHANGE tab.
Having just seen this new
option (the "CAN EXPLODE" one), we could
ask ourselves why there are two options that lead to the same result.
In fact, setting a CE with a
CONFIG 2 tab like the following...
...actually gets the same result of a CE that has a CHANGE tab like this.
The main difference is about
the kind of event you want to use as a
trigger: that particular option inside CONFIG 2 is used for very simple
events, like the element being smashed by a rock, and the only possible
result is the explosion of the element itself.
On the other hand, change
pages are used to check more complex
situations, like a CE touching a specific element at a specific side.
Also, each changepage can end up with more and different
results/actions.
CE creation is kind of a
programming language by itself, and
programming languages usually offer several ways to obtain the same
result. You should get used to that.
Imagine that you need a CE
that disappears when it touches an
emerald: you would simply make a change page with the following
settings:
And that would be enough. Now suppose that you want it to disappear not only when touching an emerald, but also when touching any other gem, regardless of its color.
You could add a changepage and
set it to change when touching a
yellow gem, then you could add another changepage and set it to change
when touching a red gem and so on with all the gems you want.
You could do that and that
would work, but there is a better way to
obtain the same result, and that's using Group Elements (we'll use GE
and GEs as shorts for them).
GEs are special elements that
work as containers: they actually
contain groups of elements, up to 16 each. You have got 32 GEs at your
disposal; their tokens range
from "group_1" to "group_32". They can be found in the GE section of
the Elements List. Their standard graphic is a multicolor (rainbow)
question mark inside of a wall of bricks  .
.
If you can't find any GE
section there, then maybe it is turned off
in the EDITOR SETUP screen.
The Property Page of a GE
shows up in this way:
You can set some graphics for
the GEs, but you will see these
graphics only in the level editor.
If you put a GE in the map,
you won't see its graphic while playing.
Try that. You should start trying out the examples of this manual: if
you follow the steps, you get the results. If you don't, then you've
made some error. If you see
that the behavior depicted in this manual is different from the actual
results in RnD, please notify me: parts of this manual could be wrong
or out-of-date.
OK, what happens if you put a
blank GE in the map and you start
testing the level? Well, the GE will "disappear". That is, the tile
where the GE should have been is an empty tile. It's most evident if
you put the GE in the middle of a map full of sand.
It happens that the GE is
being replaced with its content. By default, a blank GE
contains just one element, and that element is the "empty space"
element.
Let's go on with its settings:
change the number of elements,
increase it to 3. The "CONTENT:" will be followed by 3 empty Tiles.
Fill these
tiles with 3 different gems. You can easily find 3 different gems, they
are side by side in the RND section of the Elements List, they are
yellow, red and purple.
If you want to pick them up
without leaving the current GE Property
Page, remember to click the pin button besides of STICK THIS
SCREEN TO EDIT CONTENT, or use "Control+Click".
Once you have filled the 3
tiles of content in GE1 with the 3 gems,
you are ready to try it out in the map. Draw something like this:

If you did all the steps correctly, testing the level would result in something like this...


...or like this:
So, putting a GE directly on
the map ends up in replacing it with
one of the elements it contains. In this case, elements are picked from
the GE with a random choice.
Choice types are five:
So, now we could define GEs as
"lists of elements to pick up from".
But they aren't simply that, they have another usage that is quite more
useful: they can be used as lists of element references. That is, you
can use them in CE programming, to refer to all the elements it
contains, all at once.
Let's make a practical example:
do you remember the CE that we were
trying to make at the beginning of this section? It had to disappear
when touching a gem, regardless of its color.
We were planning to set a
change page for each gem, but now we could use a GE, along with just
one change page.
So do as follows: set GE1 to contain 1 yellow gem, 1 red gem and 1 purple gem. You have to set the number of contained elements to 3. If you set it to a bigger number and you leave empty tiles, the GE will actually contain also the "empty space" element, and we don't want that, at this moment.
The first time we wanted
the CE to disappear, but now we could make something more interesting:
set CE1 to change into GE1 when touching GE1. This would mean: change
into *one* (of the elements that appear in GE1) when touching *any* (of
the elements that appear in GE1).
Now we can put the elements on
the map, maybe in this way:
Testing the level, we'll have
something like this, at the beginning:
If now we dig the sand between
the gems and the CEs, we would get
something like this:
![]()
![]()
![]()
![]()
![]()
![]()
![]()
![]()
![]()
Maybe you have already played
with that, and you have discovered
that CE1 is a chain-reacting element. If you didn't, try something like
this:
![]()
Start playing the level,
you'll see a gem falling (it was GE1), and
just right after that...
![]()
...all CE1 elements will turn
into gems.
This is what happened in
detail: when the first gem fell to touch
the first CE1, it turned into a gem, which touched the second CE1,
which changed on its turn and on and on: this is a chain reaction.
Now we could want CE1 to turn
not just into one of the elements that
belong to GE1, but exactly into the element that triggered the change
(that is, into the element that actually touched CE1). In this case, we
would need another special element, but since we are entering the
depths of Advanced CE Programming, we'll have to jump on to the next
section.
The more advanced elements of RnD
are the Reference Elements. They can be found in the REF section of the
Elements List.
We will introduce them one by
one, starting from the second, because
we needed that at the end of the Intermediate CE Programming section.
 This reference
element is called Element Triggering Change. It does exactly what the
name says: this element is a placeholder that represents the element
that triggers the change in a changepage. It will work also outside of
the changepages, and we'll see this usage just a bit ahead in these
paragraphs.
This reference
element is called Element Triggering Change. It does exactly what the
name says: this element is a placeholder that represents the element
that triggers the change in a changepage. It will work also outside of
the changepages, and we'll see this usage just a bit ahead in these
paragraphs.
The task we have fixed in the
last section was to make a CE that
turns into the gem it actually touches. I hope that you have saved the
work we have described in the previous section. In any case, here is
the resume of the last elements
that we have created:
GE1 contains 3 elements, the
yellow gem, the red gem and the purple
gem, with random choice type.
CE1 changes into GE1 when
touching GE1.
We must change just one
setting, that is, CE1 has to change into
Element Triggering Change when touching GE1.
Now let's try that. Draw again
a level like this:
Testing the level, we'll have something like this, at the beginning:
If now we dig the sand between the gems and the CEs, we will get exactly this:
![]()
![]()
![]()
![]()
![]()
![]()
![]()
![]()
![]()
That is, each CE1 changes into
the gem it has been touched by.
Now check out the chain-reaction in this way:
![]()
Again, start playing the level, the falling gem will turn the first CE1 into a gem of matching color, and all other CE1 will chain-react following the same rule:
![]()
Very well. The kind of CE we
have just made can be called "cloner"
or "duplicator". Programming CEs, it doesn't matter so much how do you
achieve a result, it is the
result itself that matters. Obviously, some solutions can be wiser than
others.
Before introducing new
Reference Elements, we will use that Element
Triggering Change outside of a changepage, to see how it could work.
Go on using the level you are
currently practicing on, because we
need to use that GE1 again.
Now select CE2 and set it in
this way:
Now draw this on the map:

![]()
![]()
The red player above is not a
real player. It is CE2. Don't mistake
it, because if you put the real Player 2 on the map, you will see only
an empty tile in its place - supposing that you are playing in Single
Player mode, of course.
Testing the level, this would
be the situation at its beginning (the
color sequence could be different, of course):
![]()
![]()
Instantly, CE2 will start moving to the right, it will dig the gems and it will place them again onto the map after its passage:
![]()
![]()
It will go back and forth
keeping unchanged the initial color
sequence.
We aren't really making useful
things, we are just playing around
with the settings. But we will make a nice CE that could be used in a
level pretty soon.
For now, let's suppose that we
want CE2 to dig the gems and to
change their colors in the same time.
In an intuitive way, we could
set it to dig GE1 and to leave behind
GE1, so that the different colored gems will be put randomly in the
map.
OK, since the best way to
learn is to try and to see the results,
change that setting as described above and then start the map that you
have just designed.
You will get something like
this:
Something is going wrong. There
were just five gems, but now there are seven on the map.
The new gems have been left behind by CE2.
The option "leave behind
element X" means "leave behind element X any time the CE moves", doesn't
matter if it is digging something
or moving through empty tiles.
We want CE2 to change the
gems' color, but we don't want it to add a
gem were there wasn't any. So, go back to the editor and open the
CONFIG2 tab of CE2, then change the option "CAN [LEAVE BEHIND]" to "CAN
[CHANGE IT TO]".
Quite obviously, the option
"can dig element X and can change it
into element Y" will affect only the tiles that actually contain an X
element. In this way, all X elements will be changed into Y elements,
while all empty tiles will be left empty.
So, change the above option,
to make CE2 to dig GE1 and to change it
back to GE1, then start testing the level. The result is just what we
were looking for: CE2 will pass over the gems, changing their colors,
and it will add no unwanted gems.
Now that we have such a
"changer", we can make something useful out
of it, something that we can use to make a simple but nice playable
level.
Go into GE1 settings and
replace one gem with a rock. Since we know
that CE2 can dig all the elements that belong to GE1, now we can draw a
level like this:
CE2 (the red player) is stuck,
because it can't dig the sand. Walk
down and snap the sand field that blocks CE2. After the first passage,
the level could show up like this:
![]()
![]()
![]()
Important note: in RnD there
are two different types of rocks, and
even if they have exactly the same appearance (i.e. they use the same
graphics) they are not interchangeable. It means that if you put the
element called "rock" inside of the GE, and then you put the element
called "BD rock" in the level, our moving CE will *not* be able to dig
those rocks, because they don't appear inside of the GE that it uses as
reference.
To make a playable level with the CEs that we have just created, simply set (to six) the amount of gems needed to solve the level. An hypothetic user of that level will start it, will see that there is no gem around, but will see that 6 gems are needed, then s/he would think "Why is there a red player, if I am playing in single player mode? And why it is trembling so much?". Finally, s/he will probably go to free that out-of-place, additional player, and will discover that it is able to turn rocks into gems and visa-versa!
By the way, it is trembling
because it tries to move, and being
stuck, it turns left and right on its tile quite fast.
Well, not a fantastic level to
play, but this manual teaches you some techniques, while it is your
task to use them,
to create new ones and in general to make nice levels combining them
all.
Going on with the Reference
Elements, let's introduce the first one
of the section.
 This one is
called Player Triggering Change. It can't be used in a lot of ways, it
is exclusively used to make "teleporters", also called "warpers", that
relocate the player from one tile to another.
This one is
called Player Triggering Change. It can't be used in a lot of ways, it
is exclusively used to make "teleporters", also called "warpers", that
relocate the player from one tile to another.
We will use this element in
combination with an option that we
didn't use yet, but that is really useful. It is the Extended Change
Target (ECT).
When you activate the ECT
option, that changepage stops using the
single Reference Tile besides of "element changes to:" and starts using
the big black area beside the ECT option.
That big black area is made of
9 tiles (3x3), and is the effective
Extended Change Target. It works quite differently from a normal
Content Box, like those of YamYams or those in the CONFIG2 tab of all
CEs.
As usual, let's see how does
it work. Pick a blank CE, open its Property Page and go to the Change
tab. Then put a rock in the middle of
the ECT, and surround it with emeralds:

Now set the CE to change when pressed by the player, set it to use
the Extended Change target and finally put it in the middle of the
sand, on the map, just like shown below:
Now press the CE. You should get something like this:
![]()
No emeralds have been put on the map, because the default setting of
the ECT is "replace when empty".
If you had digged all the sand around the CE before pressing it...
![]()
![]()
![]()
![]()
![]()
![]()
![]()
![]()
...then you would have obtained something like this:
![]()
Now, just to play a bit with these settings, try the same CE
activating the option "replace all or nothing". This is the
result: you won't be able to change the CE by pressing it anymore.
The "replace all or nothing" options limits the change: it will
happen only if all the used tiles of the ECT box are ready for the
replacement to take place.
Since all the tiles of the ECT have been used, all the tiles around
the CE must be empty, and since one of the tiles around of the CE is
occupied by the player, the change won't take place.
Lets walk around of this problem. Remove an emerald from the ECT, so
that it will look like this:
![]()
With such settings, the change will take place only when the player
presses the CE at the top side. This is all because we have set it to
"replace when empty" and to "replace all or nothing".
Another example, just to understand that a "player" is an element
just like any other: take the last CE we have described above (the one
that works only if pressed at the top side. Now change the option
"replace when empty" to "replace when destructible".
Now try it on the following map. You will notice how handy coud be
to press it at the top side, even if it is surrounded by sand or walls,
and also how could be dangerous to press it at any other side.
The CE shown in the following map is just the last CE mentioned
above. The amount of required gems has to be set to 55 (from the INFO
screen; click the INFO button to open it). The time could be left to
100 seconds.
Have a nice game!
![]()
![]()

![]()
![]()

![]()
![]()
![]()
![]()
![]()

![]()
![]()
![]()
![]()
![]()
![]()
![]()
--- this tutorial ends here, in the middle of nowhere ---
Could you be interested, my old CEs Walkaround is a slightly
outdated tutorial which, still, covers more advanced concepts than
those we have mentioned up to this point - but there you will find no
mention of the new Reference Elements, only "element triggering change"
and "player triggering change" are covered.
This tutorial will continue explaining the Reference Elements and
will be merged with the CEs Walkaround and extended from there on. Here
is the CEs Walkaround text file,
and here is the
CEs Walkaround levelset archive.
...until I find some more time to extend this chapter.
Anyway, by the way, have fun!
Francesco.
![]()
Update Log
December the 9th, 2006
+ Added navigation links in each section (directory-style).
+ Added some content to the Standard Element Editing section (Content
Lists, Content/Reference Tiles).
+ Added several headings to improve readabilty.
! Fixed the overall styling (the background pictures, for example...)
! Fixed some broken links.
+ Several other small changes and additions (a word here, a comma
there).
--------------------------
December the 4th, 2006
. Release of the first draft of this documentation.
 FAQ
FAQ MAN
MAN TUT
TUT